Miro Video Converter main screen
You are here: Home Dive Into HTML5
Anyone who has visited YouTube.com in the past four years knows that you can embed video in a web page. But prior to HTML5, there was no standards-based way to do this. Virtually all the video you’ve ever watched “on the web” has been funneled through a third-party plugin — maybe QuickTime, maybe RealPlayer, maybe Flash. (YouTube uses Flash.) These plugins integrate with your browser well enough that you may not even be aware that you’re using them. That is, until you try to watch a video on a platform that doesn’t support that plugin.
HTML5 defines a standard way to embed video in a web page, using a <video> element. Support for the <video> element is still evolving, which is a polite way of saying it doesn’t work yet. At least, it doesn’t work everywhere. But don’t despair! There are alternatives and fallbacks and options galore.
| IE | Firefox | Safari | Chrome | Opera | iPhone | Android |
|---|---|---|---|---|---|---|
| 9.0+ | 3.5+ | 3.0+ | 3.0+ | 10.5+ | 1.0+ | 2.0+ |
But support for the <video> element itself is really only a small part of the story. Before we can talk about HTML5 video, you first need to understand a little about video itself. (If you know about video already, you can skip ahead to What Works on the Web.)
You may think of video files as “AVI files” or “MP4 files.” In reality, “AVI” and “MP4” are just container formats. Just like a ZIP file can contain any sort of file within it, video container formats only define how to store things within them, not what kinds of data are stored. (It’s a little more complicated than that, because not all video streams are compatible with all container formats, but never mind that for now.)
A video file usually contains multiple tracks — a video track (without audio), plus one or more audio tracks (without video). Tracks are usually interrelated. An audio track contains markers within it to help synchronize the audio with the video. Individual tracks can have metadata, such as the aspect ratio of a video track, or the language of an audio track. Containers can also have metadata, such as the title of the video itself, cover art for the video, episode numbers (for television shows), and so on.
There are lots of video container formats. Some of the most popular include
.mp4 or .m4v extension. The MPEG 4 container is based on Apple’s older QuickTime container (.mov). Movie trailers on Apple’s website still use the older QuickTime container, but movies that you rent from iTunes are delivered in an MPEG 4 container..ogv extension. Ogg is an open standard, open source–friendly, and unencumbered by any known patents. Firefox 3.5, Chrome 4, and Opera 10.5 support — natively, without platform-specific plugins — the Ogg container format, Ogg video (called “Theora”), and Ogg audio (called “Vorbis”). On the desktop, Ogg is supported out-of-the-box by all major Linux distributions, and you can use it on Mac and Windows by installing the QuickTime components or DirectShow filters, respectively. It is also playable with the excellent VLC on all platforms..flv extension. Flash Video is, unsurprisingly, used by Adobe Flash. Prior to Flash 9.0.60.184 (a.k.a. Flash Player 9 Update 3), this was the only container format that Flash supported. All recent versions of Flash also support the MPEG 4 container..webm extension. WebM is a royalty-free, open source–friendly video compression designed specifically for use with HTML5 video, leveraging the VP8 video codec and Vorbis audio codec. It is technically similar to another format, called Matroska. It is supported natively, without platform-specific plugins, in the latest versions of Chromium, Google Chrome, Mozilla Firefox, and Opera.
.asf extension. The ASF container format was invented by Microsoft for video streaming. It included a delightful DRM scheme which restricted users from backing up their legally purchased licenses. So, if for some reason you lost your license to the content, they thought you should buy it again.
.avi extension. The AVI container format was invented by Microsoft in a simpler time, when the fact that computers could play video at all was considered pretty amazing. It does not officially support features of more recent container formats like embedded metadata. It does not even officially support most of the modern video and audio codecs in use today. Over time, companies have tried to extend it in generally incompatible ways to support this or that, and it is still the default container format for popular encoders such as MEncoder.
When you talk about “watching a video,” you’re probably talking about a combination of one video stream and one audio stream. But you don’t have two different files; you just have “the video.” Maybe it’s an AVI file, or an MP4 file. These are just container formats, like a ZIP file that contains multiple kinds of files within it. The container format defines how to store the video and audio streams in a single file.
When you “watch a video,” your video player is doing at least three things at once:
A video codec is an algorithm by which a video stream is encoded, i.e. it specifies how to do #2 above. (The word “codec” is a portmanteau, a combination of the words “coder” and “decoder.”) Your video player decodes the video stream according to the video codec, then displays a series of images, or “frames,” on the screen. Most modern video codecs use all sorts of tricks to minimize the amount of information required to display one frame after the next. For example, instead of storing each individual frame (like a screenshot), they will only store the differences between frames. Most videos don’t actually change all that much from one frame to the next, so this allows for high compression rates, which results in smaller file sizes.
There are lossy and lossless video codecs. Lossless video is much too big to be useful on the web, so I’ll concentrate on lossy codecs. A lossy video codec means that information is being irretrievably lost during encoding. Like copying an audio cassette tape, you’re losing information about the source video, and degrading the quality, every time you encode. Instead of the “hiss” of an audio cassette, a re-re-re-encoded video may look blocky, especially during scenes with a lot of motion. (Actually, this can happen even if you encode straight from the original source, if you choose a poor video codec or pass it the wrong set of parameters.) On the bright side, lossy video codecs can offer amazing compression rates by smoothing over blockiness during playback, to make the loss less noticeable to the human eye.
There are tons of video codecs. The three most relevant codecs are H.264, Theora, and VP8.
H.264 is also known as “MPEG-4 part 10,” a.k.a. “MPEG-4 AVC,” a.k.a. “MPEG-4 Advanced Video Coding.” H.264 was also developed by the MPEG group and standardized in 2003. It aims to provide a single codec for low-bandwidth, low-CPU devices (cell phones); high-bandwidth, high-CPU devices (modern desktop computers); and everything in between. To accomplish this, the H.264 standard is split into “profiles,” which each define a set of optional features that trade complexity for file size. Higher profiles use more optional features, offer better visual quality at smaller file sizes, take longer to encode, and require more CPU power to decode in real-time.
To give you a rough idea of the range of profiles, Apple’s iPhone supports Baseline profile, the AppleTV set-top box supports Baseline and Main profiles, and Adobe Flash on a desktop PC supports Baseline, Main, and High profiles. YouTube now uses H.264 to encode high-definition videos, playable through Adobe Flash; YouTube also provides H.264-encoded video to mobile devices, including Apple’s iPhone and phones running Google’s Android mobile operating system. Also, H.264 is one of the video codecs mandated by the Blu-Ray specification; Blu-Ray discs that use it generally use the High profile.
Most non-PC devices that play H.264 video (including iPhones and standalone Blu-Ray players) actually do the decoding on a dedicated chip, since their main CPUs are nowhere near powerful enough to decode the video in real-time. These days, even low-end desktop graphics cards support decoding H.264 in hardware. There are competing H.264 encoders, including the open source x264 library. The H.264 standard is patent-encumbered; licensing is brokered through the MPEG LA group. H.264 video can be embedded in most popular container formats, including MP4 (used primarily by Apple’s iTunes Store) and MKV (used primarily by non-commercial video enthusiasts).
Theora evolved from the VP3 codec and has subsequently been developed by the Xiph.org Foundation. Theora is a royalty-free codec and is not encumbered by any known patents other than the original VP3 patents, which have been licensed royalty-free. Although the standard has been “frozen” since 2004, the Theora project (which includes an open source reference encoder and decoder) only released version 1.0 in November 2008 and version 1.1 in September 2009.
Theora video can be embedded in any container format, although it is most often seen in an Ogg container. All major Linux distributions support Theora out-of-the-box, and Mozilla Firefox 3.5 includes native support for Theora video in an Ogg container. And by “native”, I mean “available on all platforms without platform-specific plugins.” You can also play Theora video on Windows or on Mac OS X after installing Xiph.org’s open source decoder software.
VP8 is another video codec from On2, the same company that originally developed VP3 (later Theora). Technically, it produces output on par with H.264 High Profile, while maintaining a low decoding complexity on par with H.264 Baseline.
In 2010, Google acquired On2 and published the video codec specification and a sample encoder and decoder as open source. As part of this, Google also “opened” all the patents that On2 had filed on VP8, by licensing them royalty-free. (This is the best you can hope for with patents. You can’t actually “release” them or nullify them once they’ve been issued. To make them open source–friendly, you license them royalty-free, and then anyone can use the technologies the patents cover without paying anything or negotiating patent licenses.) As of May 19, 2010, VP8 is a royalty-free, modern codec and is not encumbered by any known patents, other than the patents that On2 (now Google) has already licensed royalty-free.
Unless you’re going to stick to films made before 1927 or so, you’re going to want an audio track in your video. Like video codecs, audio codecs are algorithms by which an audio stream is encoded. Like video codecs, there are lossy and lossless audio codecs. And like lossless video, lossless audio is really too big to put on the web. So I’ll concentrate on lossy audio codecs.
Actually, it’s even narrower than that, because there are different categories of lossy audio codecs. Audio is used in places where video is not (telephony, for example), and there is an entire category of audio codecs optimized for encoding speech. You wouldn’t rip a music CD with these codecs, because the result would sound like a 4-year-old singing into a speakerphone. But you would use them in an Asterisk PBX, because bandwidth is precious, and these codecs can compress human speech into a fraction of the size of general-purpose codecs. However, due to lack of support in both native browsers and third-party plugins, speech-optimized audio codecs never really took off on the web. So I’ll concentrate on general purpose lossy audio codecs.
As I mentioned earlier, when you “watch a video,” your computer is doing at least three things at once:
The audio codec specifies how to do #3 — decoding the audio stream and turning it into digital waveforms that your speakers then turn into sound. As with video codecs, there are all sorts of tricks to minimize the amount of information stored in the audio stream. And since we’re talking about lossy audio codecs, information is being lost during the recording → encoding → decoding → listening lifecycle. Different audio codecs throw away different things, but they all have the same purpose: to trick your ears into not noticing the parts that are missing.
One concept that audio has that video does not is channels. We’re sending sound to your speakers, right? Well, how many speakers do you have? If you’re sitting at your computer, you may only have two: one on the left and one on the right. My desktop has three: left, right, and one more on the floor. So-called “surround sound” systems can have six or more speakers, strategically placed around the room. Each speaker is fed a particular channel of the original recording. The theory is that you can sit in the middle of the six speakers, literally surrounded by six separate channels of sound, and your brain synthesizes them and feels like you’re in the middle of the action. Does it work? A multi-billion-dollar industry seems to think so.
Most general-purpose audio codecs can handle two channels of sound. During recording, the sound is split into left and right channels; during encoding, both channels are stored in the same audio stream; during decoding, both channels are decoded and each is sent to the appropriate speaker. Some audio codecs can handle more than two channels, and they keep track of which channel is which and so your player can send the right sound to the right speaker.
There are lots of audio codecs. Did I say there were lots of video codecs? Forget that. There are gobs and gobs of audio codecs, but on the web, there are really only three you need to know about: MP3, AAC, and Vorbis.
MPEG-1 Audio Layer 3 is colloquially known as “MP3.” If you haven’t heard of MP3s, I don’t know what to do with you. Walmart sells portable music players and calls them “MP3 players.” Walmart. Anyway…
MP3s can contain up to 2 channels of sound. They can be encoded at different bitrates: 64 kbps, 128 kbps, 192 kbps, and a variety of others from 32 to 320. Higher bitrates mean larger file sizes and better quality audio, although the ratio of audio quality to bitrate is not linear. (128 kbps sounds more than twice as good as 64 kbps, but 256 kbps doesn’t sound twice as good as 128 kbps.) Furthermore, the MP3 format allows for variable bitrate encoding, which means that some parts of the encoded stream are compressed more than others. For example, silence between notes can be encoded at a low bitrate, then the bitrate can spike up a moment later when multiple instruments start playing a complex chord. MP3s can also be encoded with a constant bitrate, which, unsurprisingly, is called constant bitrate encoding.
The MP3 standard doesn’t define exactly how to encode MP3s (although it does define exactly how to decode them); different encoders use different psychoacoustic models that produce wildly different results, but are all decodable by the same players. The open source LAME project is the best free encoder, and arguably the best encoder period for all but the lowest bitrates.
The MP3 format (standardized in 1991) is patent-encumbered, which explains why Linux can’t play MP3 files out of the box. Pretty much every portable music player supports standalone MP3 files, and MP3 audio streams can be embedded in any video container. Adobe Flash can play both standalone MP3 files and MP3 audio streams within an MP4 video container.
Advanced Audio Coding is affectionately known as “AAC.” Standardized in 1997, it lurched into prominence when Apple chose it as their default format for the iTunes Store. Originally, all AAC files “bought” from the iTunes Store were encrypted with Apple’s proprietary DRM scheme, called FairPlay. Selected songs in the iTunes Store are now available as unprotected AAC files, which Apple calls “iTunes Plus” because it sounds so much better than calling everything else “iTunes Minus.” The AAC format is patent-encumbered; licensing rates are available online.
AAC was designed to provide better sound quality than MP3 at the same bitrate, and it can encode audio at any bitrate. (MP3 is limited to a fixed number of bitrates, with an upper bound of 320 kbps.) AAC can encode up to 48 channels of sound, although in practice no one does that. The AAC format also differs from MP3 in defining multiple profiles, in much the same way as H.264, and for the same reasons. The “low-complexity” profile is designed to be playable in real-time on devices with limited CPU power, while higher profiles offer better sound quality at the same bitrate at the expense of slower encoding and decoding.
All current Apple products, including iPods, AppleTV, and QuickTime support certain profiles of AAC in standalone audio files and in audio streams in an MP4 video container. Adobe Flash supports all profiles of AAC in MP4, as do the open source MPlayer and VLC video players. For encoding, the FAAC library is the open source option; support for it is a compile-time option in mencoder and ffmpeg.
Vorbis is often called “Ogg Vorbis,” although this is technically incorrect. (“Ogg” is just a container format, and Vorbis audio streams can be embedded in other containers.) Vorbis is not encumbered by any known patents and is therefore supported out-of-the-box by all major Linux distributions and by portable devices running the open source Rockbox firmware. Mozilla Firefox 3.5 supports Vorbis audio files in an Ogg container, or Ogg videos with a Vorbis audio track. Android mobile phones can also play standalone Vorbis audio files. Vorbis audio streams are usually embedded in an Ogg or WebM container, but they can also be embedded in an MP4 or MKV container (or, with some hacking, in AVI). Vorbis supports an arbitrary number of sound channels.
There are open source Vorbis encoders and decoders, including OggConvert (encoder), ffmpeg (decoder), aoTuV (encoder), and libvorbis (decoder). There are also QuickTime components for Mac OS X and DirectShow filters for Windows.
If your eyes haven’t glazed over yet, you’re doing better than most. As you can tell, video (and audio) is a complicated subject — and this was the abridged version! I’m sure you’re wondering how all of this relates to HTML5. Well, HTML5 includes a <video> element for embedding video into a web page. There are no restrictions on the video codec, audio codec, or container format you can use for your video. One <video> element can link to multiple video files, and the browser will choose the first video file it can actually play. It is up to you to know which browsers support which containers and codecs.
As of this writing, this is the landscape of HTML5 video:
That might be easier to digest in table form.
| Codecs/container | IE | Firefox | Safari | Chrome | Opera | iPhone | Android |
|---|---|---|---|---|---|---|---|
| Theora+Vorbis+Ogg | · | 3.5+ | † | 5.0+ | 10.5+ | · | · |
| H.264+AAC+MP4 | 9.0+ | · | 3.0+ | 5.0+‡ | · | 3.0+ | 2.0+ |
| WebM | 9.0+* | 4.0+ | † | 6.0+ | 10.6+ | · | 2.3+ |
| * Internet Explorer 9 will only support WebM “when the user has installed a VP8 codec”. | |||||||
| † Safari will play anything that QuickTime can play. QuickTime comes pre-installed with H.264/AAC/MP4 support. There are installable third-party plugins that add support for Theora and WebM, but each user needs to install these plugins before Safari will recognize those video formats. | |||||||
| ‡ Google Chrome promised to drop support for H.264 in 2011, but it never happened. | |||||||
And now for the knockout punch:
There is no single combination of containers and codecs that works in all HTML5 browsers.
This is not likely to change in the near future.
To make your video watchable across all of these devices and platforms, you’re going to need to encode your video more than once.
For maximum compatibility, here’s what your video workflow will look like:
<video> element, and fall back to a Flash-based video player.
* WebM and H.264 have sufficient support. So, unless you're supporting Firefox 3.5 or Opera 10.5, you can drop Theora.
Before we continue, I need to point out that there is a cost to encoding your videos twice. Well, there’s the obvious cost, that you have to encode your videos twice, and that takes more computers and more time than just doing it once. But there’s another real cost associated with H.264 video: licensing costs.
Remember when I first explained H.264 video, and I mentioned offhand that the video codec was patent-encumbered and licensing was brokered by the MPEG LA consortium. That turns out to be kind of important. To understand why it’s important, I direct you to The H.264 Licensing Labyrinth:
MPEG LA splits the H.264 license portfolio into two sublicenses: one for manufacturers of encoders or decoders and the other for distributors of content. …
The sublicense on the distribution side gets further split out to four key subcategories, two of which (subscription and title-by-title purchase or paid use) are tied to whether the end user pays directly for video services, and two of which (“free” television and internet broadcast) are tied to remuneration from sources other than the end viewer. …
The licensing fee for “free” television is based on one of two royalty options. The first is a one-time payment of $2,500 per AVC transmission encoder, which covers one AVC encoder “used by or on behalf of a Licensee in transmitting AVC video to the End User,” who will decode and view it. If you’re wondering whether this is a double charge, the answer is yes: A license fee has already been charged to the encoder manufacturer, and the broadcaster will in turn pay one of the two royalty options.
The second licensing fee is an annual broadcast fee. … [T]he annual broadcast fee is broken down by viewership sizes:
- $2,500 per calendar year per broadcast markets of 100,000–499,999 television households
- $5,000 per calendar year per broadcast market of 500,000–999,999 television households
- $10,000 per calendar year per broadcast market of 1,000,000 or more television households
… With all the issues around “free” television, why should someone involved in nonbroadcast delivery care? As I mentioned before, the participation fees apply to any delivery of content. After defining that “free” television meant more than just [over-the-air], MPEG LA went on to define participation fees for internet broadcasting as “AVC video that is delivered via the Worldwide Internet to an end user for which the end user does not pay remuneration for the right to receive or view.” In other words, any public broadcast, whether it is [over-the-air], cable, satellite, or the internet, is subject to participation fees. …
The fees are potentially somewhat steeper for internet broadcasts, perhaps assuming that internet delivery will grow much faster than OTA or “free” television via cable or satellite. Adding the “free television” broadcast-market fee together with an additional fee, MPEG LA grants a reprieve of sorts during the first license term, which ends on Dec. 31, 2010, and notes that “after the first term the royalty shall be no more than the economic equivalent of royalties payable during the same time for free television.”
That last part — about the fee structure for internet broadcasts — has already been amended. The MPEG-LA recently announced that internet streaming would not be charged. That does not mean that H.264 is royalty-free for all users. In particular, encoders (like the one that processes video uploaded to YouTube) and decoders (like the one included in Microsoft Internet Explorer 9) are still subject to licensing fees. See Free as in smokescreen for more information.
There are many tools for encoding video, and there are many video encoding options that affect video quality. If you do not wish to take the time to understand anything about video encoding, this section is for you.
Miro Video Converter is an open source, GPL-licensed program for encoding video in multiple formats. Download it for Mac OS X or Windows. It supports all the output formats mentioned in this chapter. It offers no options beyond choosing a video file and choosing an output format. It can take virtually any video file as input, including DV video produced by consumer-level camcorders. It produces reasonable quality output from most videos. Due to its lack of options, if you are unhappy with the output, you have no recourse but to try another program.
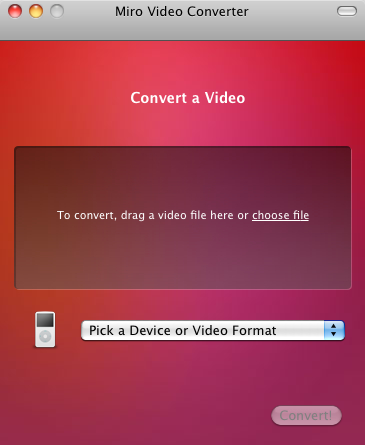
To start, just launch the Miro Video Converter application.
Miro Video Converter main screen

Click “Choose file” and select the source video you want to encode.
“Choose file”
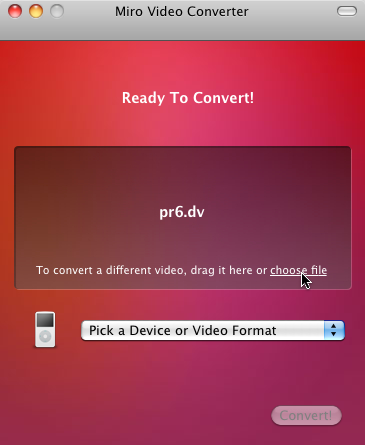
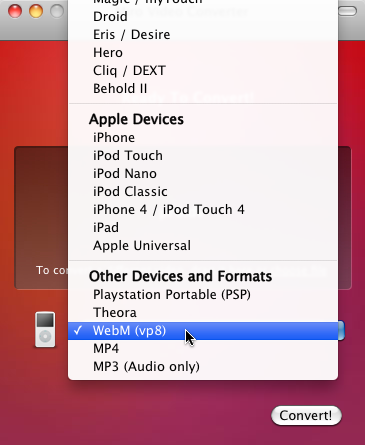
The “Pick a Device or Video Format” dropdown menu lists a variety of devices and formats. For the purposes of this chapter, we are only interested in three of them.
Select “WebM” first.
Choosing WebM output
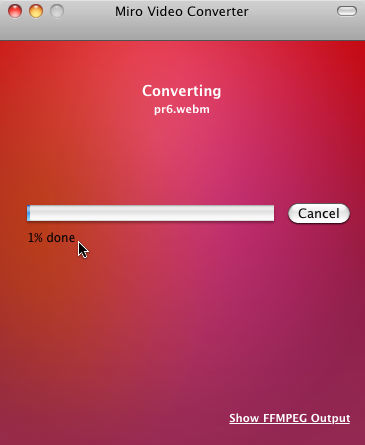
Click the “Convert” button and Miro Video Converter will immediately start encoding your video. The output file will be named SOURCEFILE.webm and will be saved in the same directory as the source video.
You’ll be staring at this screen
for a long time
Once the encoding is complete, you’ll be dumped back to the main screen. This time, select “Theora” from the Devices and Formats list.
Time for Theora
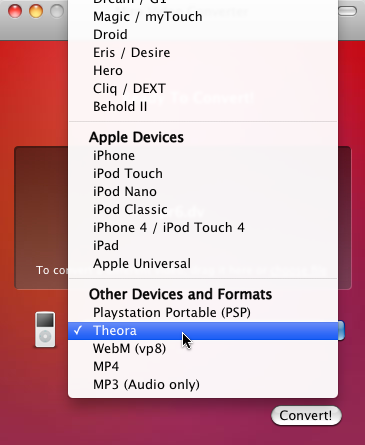
That’s it; press the “Convert” button again to encode your Theora video. The video will be named SOURCEFILE.theora.ogv and will be saved in the same directory as the source video.
Time for a cup of coffee
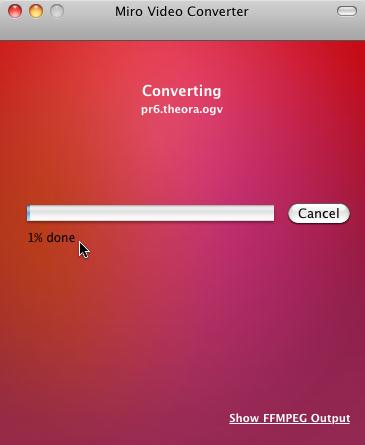
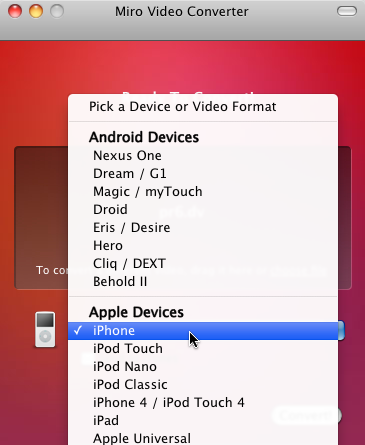
Finally, encode your iPhone-compatible H.264 video by selecting “iPhone” from the Devices and Formats list.
iPhone, not iPhone 4
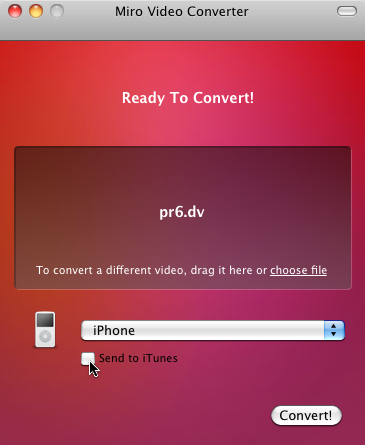
For iPhone-compatible video, Miro Video Converter will give you an option to send the encoded file to your iTunes library. I have no opinion on whether you would want to do that, but it’s not necessary for publishing video on the web.
Don’t send to iTunes
Press the magical “Convert” button and wait. The encoded file will be named SOURCENAME.iphone.mp4 and will be saved in the same directory as the source video.
Do some yoga or something
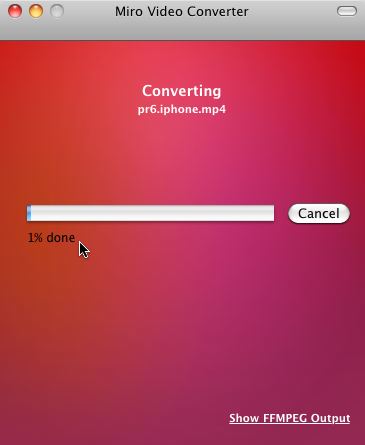
You should now have three video files alongside your original source video. If you’re satisfied with the video quality, skip ahead to At Last, The Markup to see how to assemble them into a single <video> element that works across browsers. If you’d like to learn more about other tools or video encoding options, read on.
(In this section, I’m going to use “Ogg video” as a shorthand for “Theora video and Vorbis audio in an Ogg container.” This is the combination of codecs+container that works natively in Mozilla Firefox and Google Chrome.)
Firefogg is an open source, GPL-licensed Firefox extension for encoding Ogg video. To use it, you’ll need to install Mozilla Firefox 3.5 or later, then visit firefogg.org.
Firefogg home page
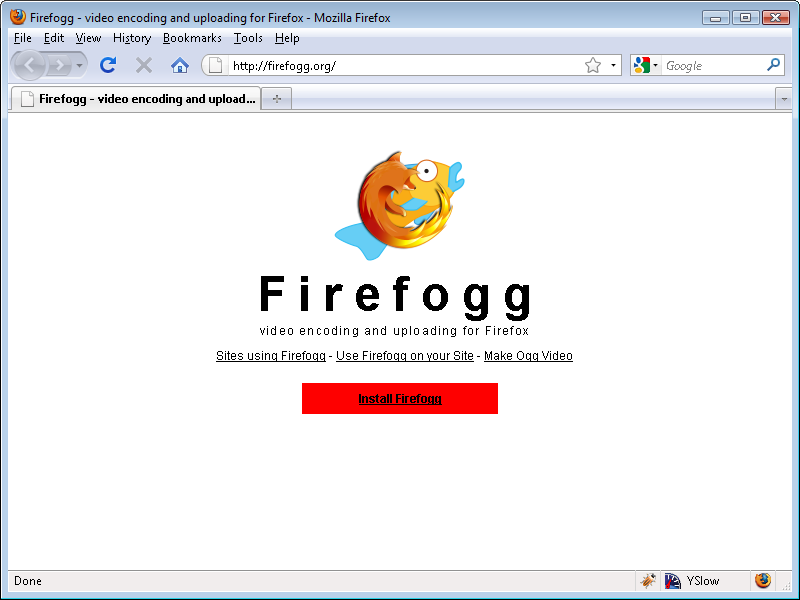
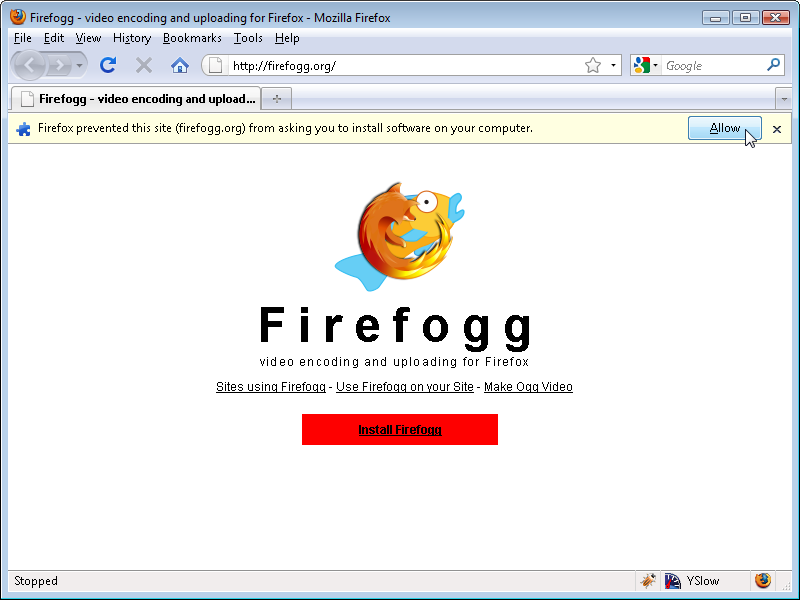
Click “Install Firefogg.” Firefox will prompt whether you really want to allow the site to install an extension. Click “Allow” to continue.
Allow Firefogg to install
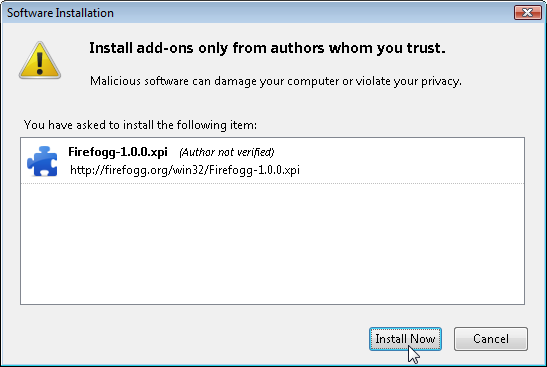
Firefox will present the standard software installation window. Click “Install” to continue.
Install Firefogg
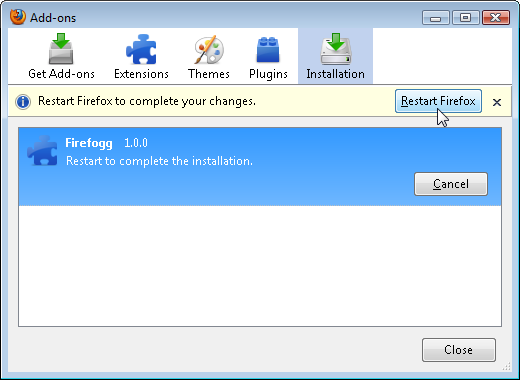
Click “Restart Firefox” to complete the installation.
Restart Firefox
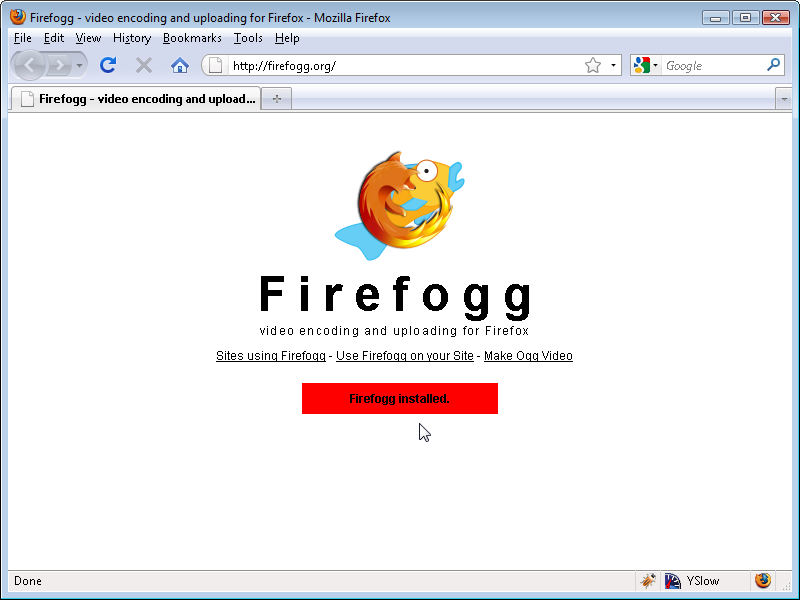
After restarting Firefox, firefogg.org will confirm that Firefogg was successfully installed.
Installation successful
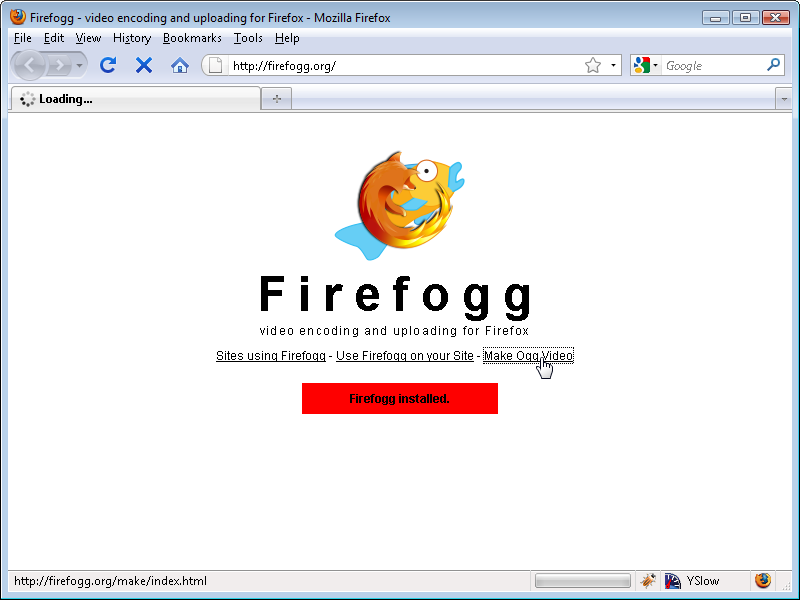
Click “Make Ogg Video” to start the encoding process.
Let’s make some video!
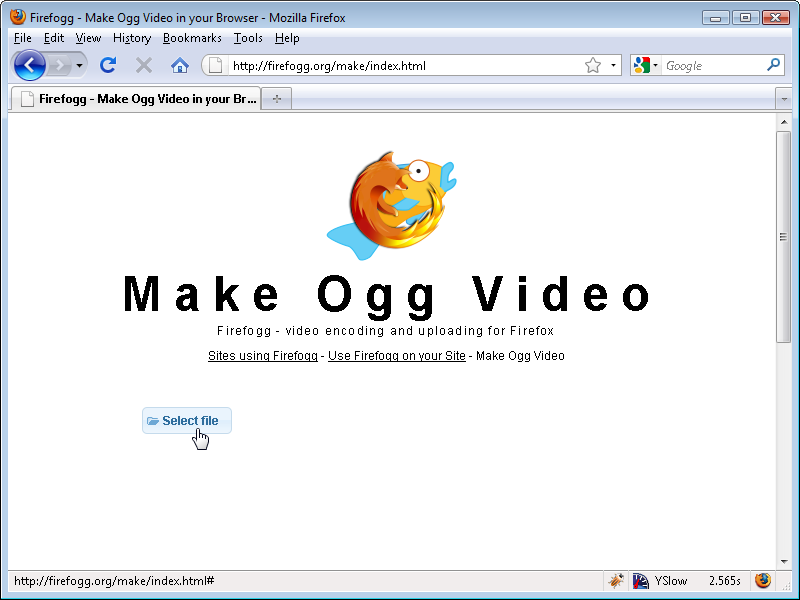
Click “Select file” to select your source video.
Select your video file
Firefogg has six “tabs”:
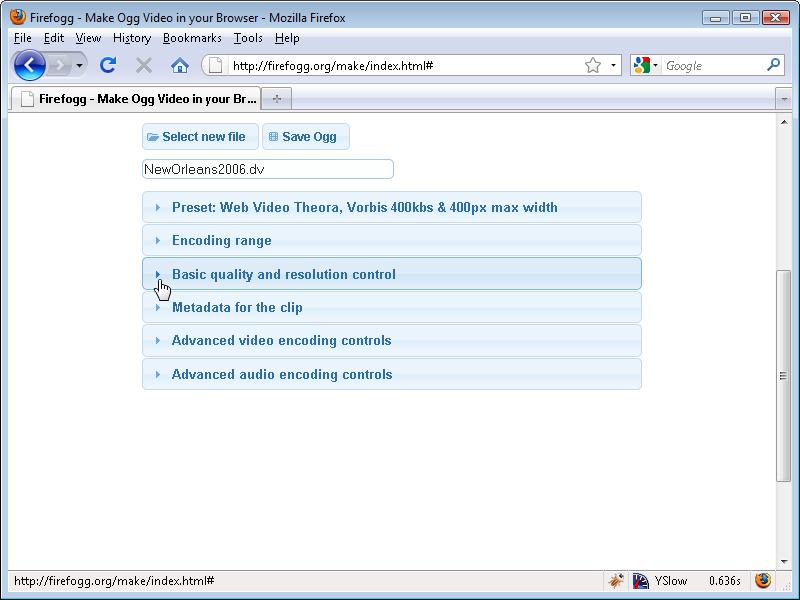
The only options I’m going to cover are in the “Basic quality and resolution control” tab. It contains all the important options:
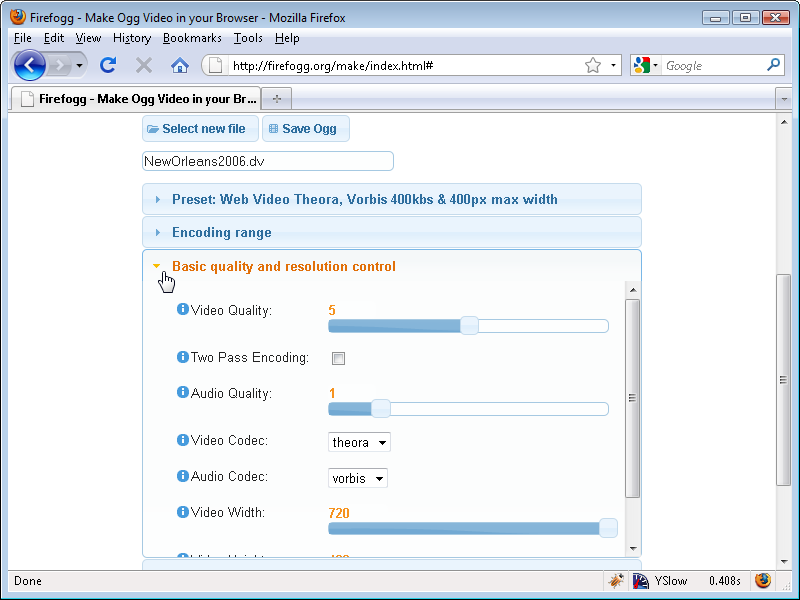
In this example, I’m going to resize the video to half its original width. Notice how Firefogg automatically adjusts the height to match.
Adjust video width and height
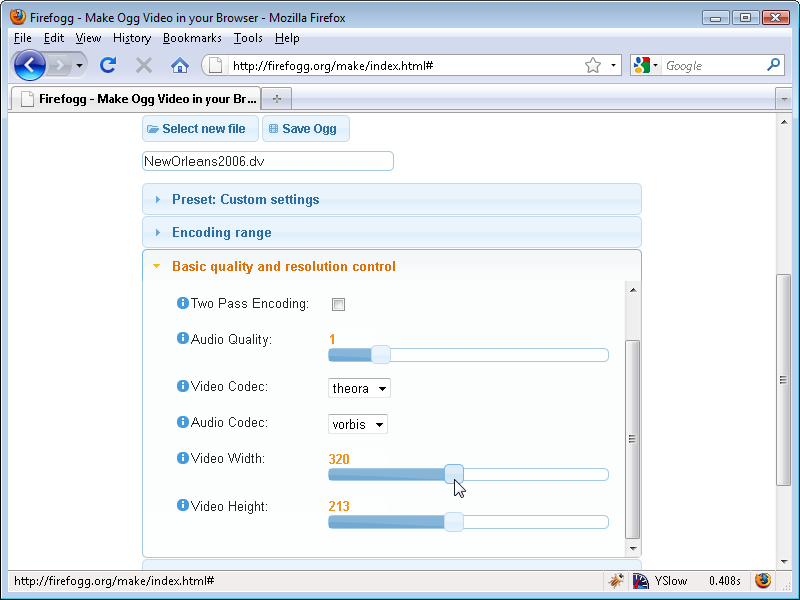
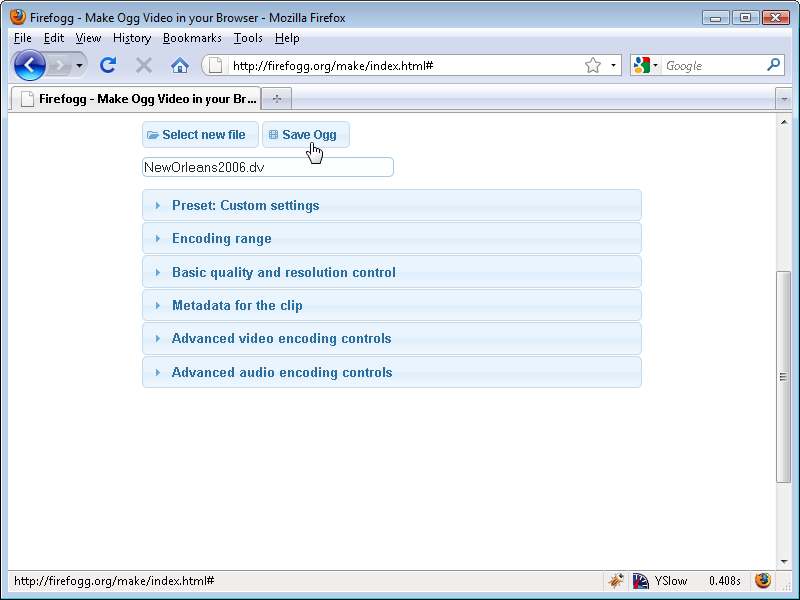
Once you’ve fiddled with all the knobs, click “Save Ogg” to start the actual encoding process. Firefogg will prompt you for a filename for the encoded video.
“Save Ogg”
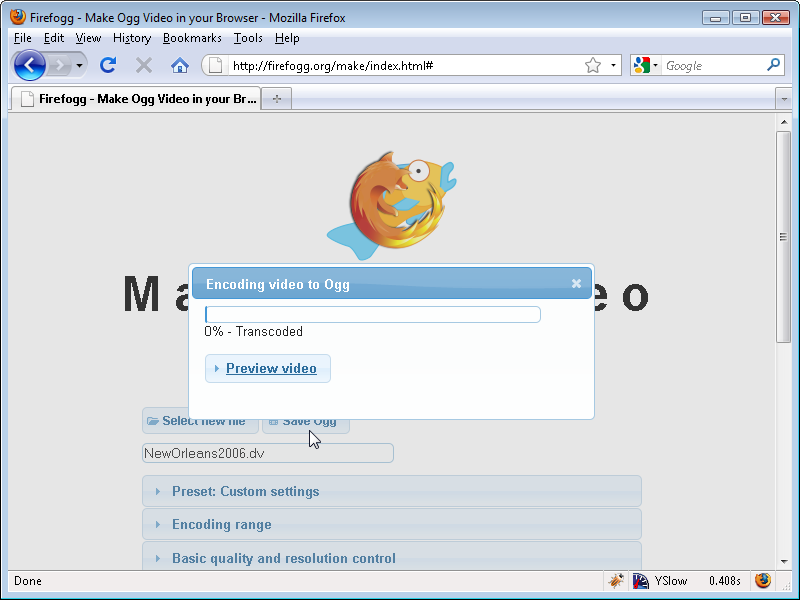
Firefogg will show a nice progress bar as it encodes your video. All you need to do is wait (and wait, and wait)!
Encoding in progress
(Just as in the previous section, in this section I’m going to use “Ogg video” as a shorthand for “Theora video and Vorbis audio in an Ogg container.” This is the combination of codecs+container that works natively in Mozilla Firefox and Google Chrome.)
If you’re looking at batch encoding a lot of Ogg video files and you want to automate the process, you should definitely check out ffmpeg2theora.
ffmpeg2theora is an open source, GPL-licensed application for encoding Ogg video. Pre-built binaries are available for Mac OS X, Windows, and modern Linux distributions. It can take virtually any video file as input, including DV video produced by consumer-level camcorders.
To use ffmpeg2theora, you need to call it from the command line. (On Mac OS X, open Applications → Utilities → Terminal. On Windows, open your Start Menu → Programs → Accessories → Command Prompt.)
ffmpeg2theora can take a large number of command line flags. (Type ffmpeg2theora --help to read about them all.) I’ll focus on just three of them.
--video-quality Q, where “Q” is a number from 0–10.
--audio-quality Q, where “Q” is a number from -2–10.
--max_size=WxH, where “W” and “H” are the maximum width and height you want for the video. (The “x” in between is really just the letter “x”.) ffmpeg2theora will resize the video proportionally to fit within these dimensions, so the encoded video might be smaller than W×H. For example, encoding a 720×480 video with --max_size 320x240 will produce a video that is 320×213.
Thus, here is how you could encode a video with the same settings as we used in the previous section (encoding with Firefogg).
you@localhost$ ffmpeg2theora --videoquality 5
                             --audioquality 1
                             --max_size 320x240
                             pr6.dv
The encoded video will be saved in the same directory as the original video, with a .ogv extension added. You can specify a different location and/or filename by passing an --output=/path/to/encoded/video command line flag to ffmpeg2theora.
(In this section, I’m going to use “H.264 video” as a shorthand for “H.264 baseline profile video and AAC low-complexity profile audio in an MPEG-4 container.” This is the combination of codecs+container that works natively in Safari, in Adobe Flash, on the iPhone, and on Google Android devices.)
Licensing issues aside, the easiest way to encode H.264 video is HandBrake. HandBrake is an open source, GPL-licensed application for encoding H.264 video. (It used to do other video formats too, but in the latest version the developers have dropped support for most other formats and are focusing all their efforts on H.264 video.) Pre-built binaries are available for Windows, Mac OS X, and modern Linux distributions.
HandBrake comes in two flavors: graphical and command-line. I’ll walk you through the graphical interface first, then we’ll see how my recommended settings translate into the command-line version.
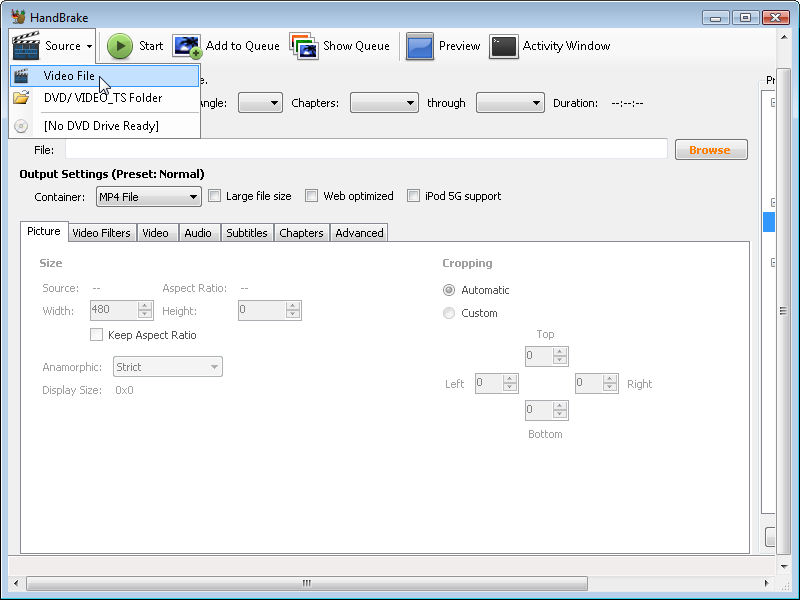
After you open the HandBrake application, the first thing to do is select your source video. Click the “Source” dropdown button and choose “Video File” to select a file. HandBrake can take virtually any video file as input, including DV video produced by consumer-level camcorders.
Select your source video
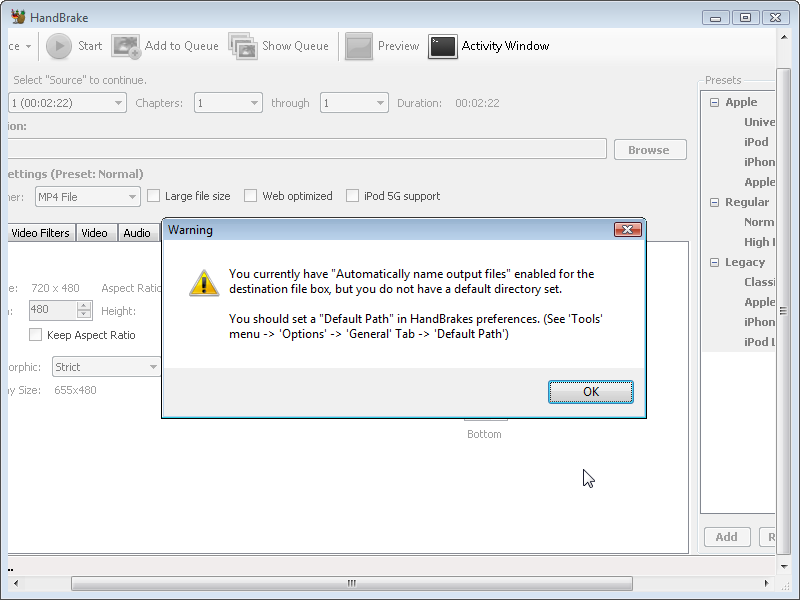
HandBrake will complain that you haven’t set a default directory to save your encoded videos. You can safely ignore this warning, or you can open the options window (under the “Tools” menu) and set a default output directory.
Ignore this
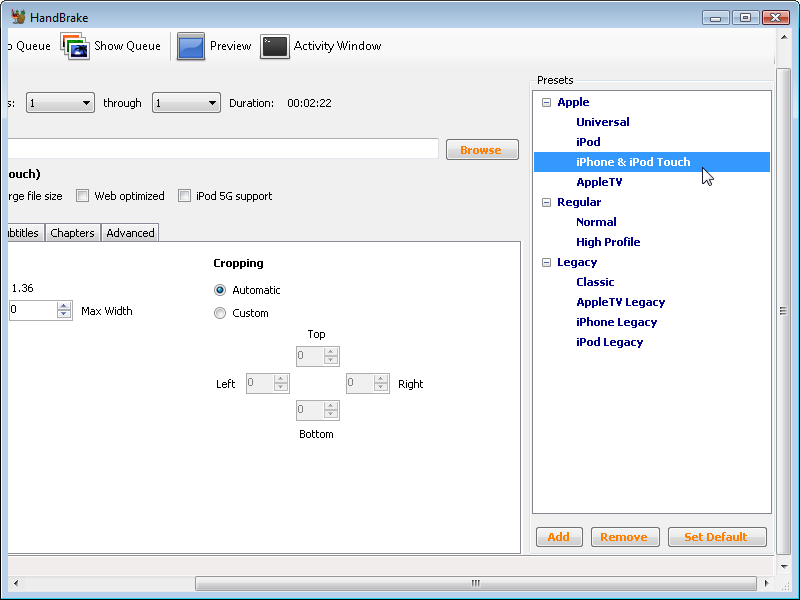
On the right-hand side is a list of presets. Selecting the “iPhone & iPod Touch” preset will set most of the options you need.
Select iPhone preset
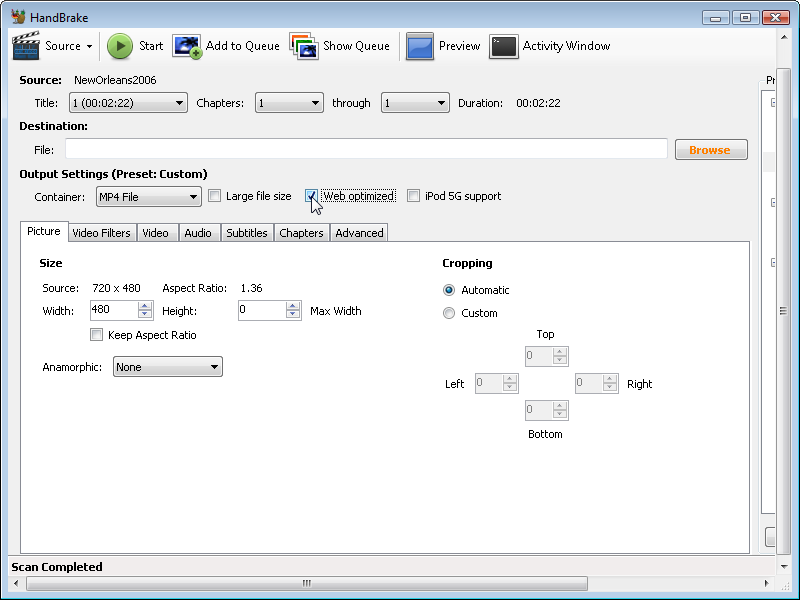
One important option that is off by default is the “Web optimized” option. Selecting this option reorders some of the metadata within the encoded video so you can watch the start of the video while the rest is downloading in the background. I highly recommend always checking this option. It does not affect the quality or file size of the encoded video, so there’s really no reason not to.
Always optimize for web
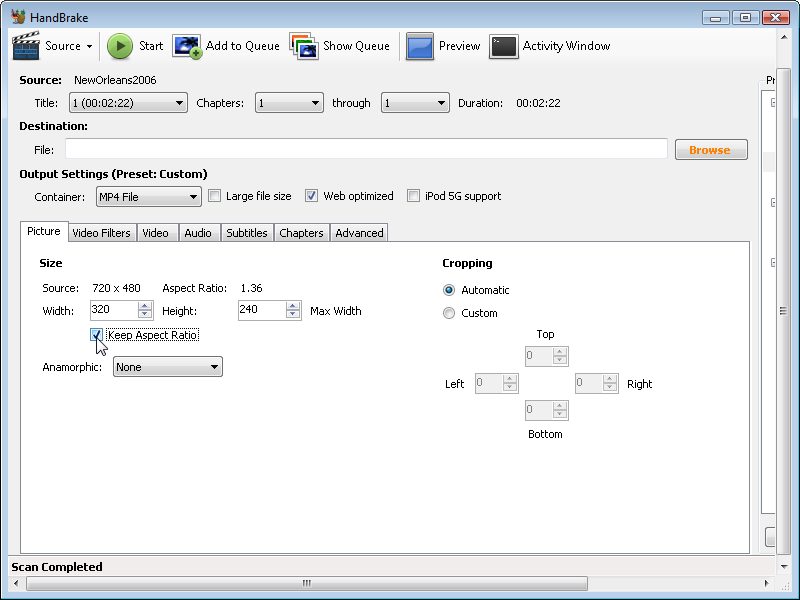
In the “Picture” tab, you can set the maximum width and height of the encoded video. You should also select the “Keep Aspect Ratio” option to ensure that HandBrake doesn’t smoosh or stretch your video while resizing it.
Set width and height
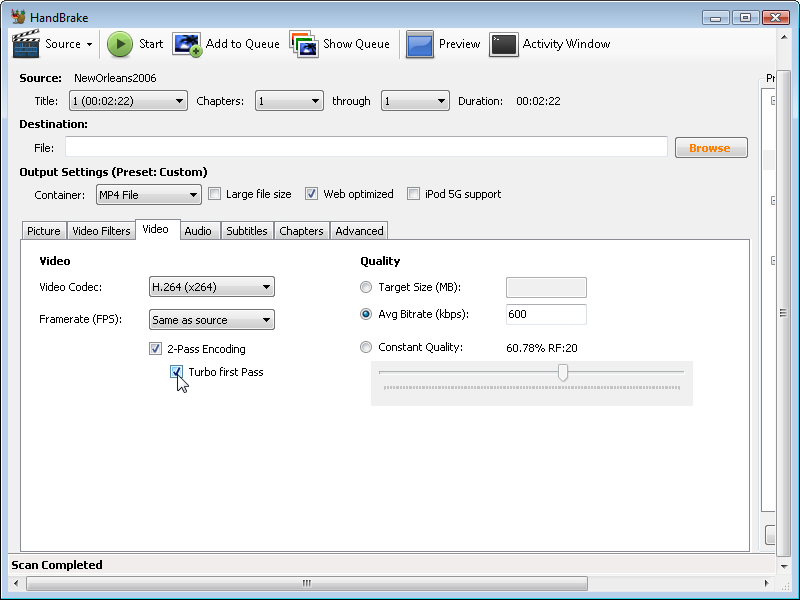
In the “Video” tab, you can set four important options.
Q: Can I use two-pass encoding on Ogg video too?
A: Yes, but due to fundamental differences in how the encoder works, you probably don’t need to. Two-pass H.264 encoding almost always results in higher quality video. Two-pass Ogg encoding of Ogg video is only useful if you’re trying to get your encoded video to be a specific file size. (Maybe that is something you’re interested in, but it’s not what these examples show, and it’s probably not worth the extra time for encoding web video.) For best Ogg video quality, use the video quality settings, and don’t worry about two-pass encoding.
In this example, I’ve chosen an average bitrate of 600 kbps, which is quite high for a 320×240 encoded video. (Later in this chapter, I’ll show you a sample video encoded at 200 kbps.) I’ve also chosen 2-pass encoding with a “turbo” first pass.
Video quality options
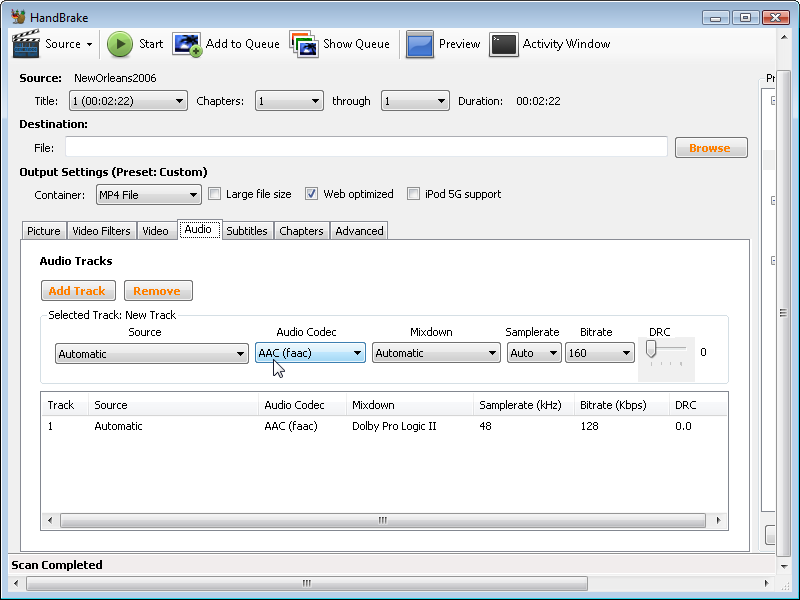
In the “Audio” tab, you probably don’t need to change anything. If your source video has multiple audio tracks, you might need to select which one you want in the encoded video. If your video is mostly a person talking (as opposed to music or general ambient sounds), you can probably reduce the audio bitrate to 96 kbps or so. Other than that, the defaults you inherited from the “iPhone” preset should be fine.
Audio quality options
Next, click the “Browse” button and choose a directory and filename to save your encoded video.
Set destination filename
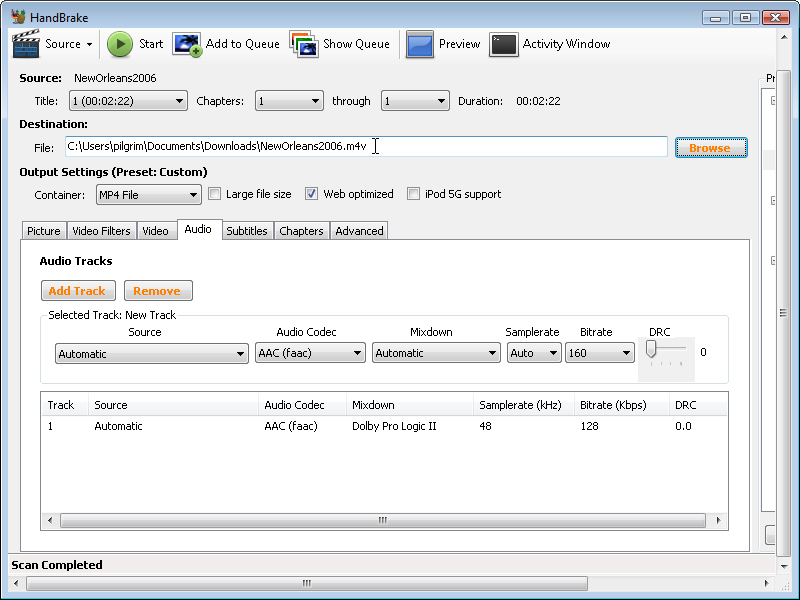
Finally, click “Start” to start encoding.
Let’s make some video!
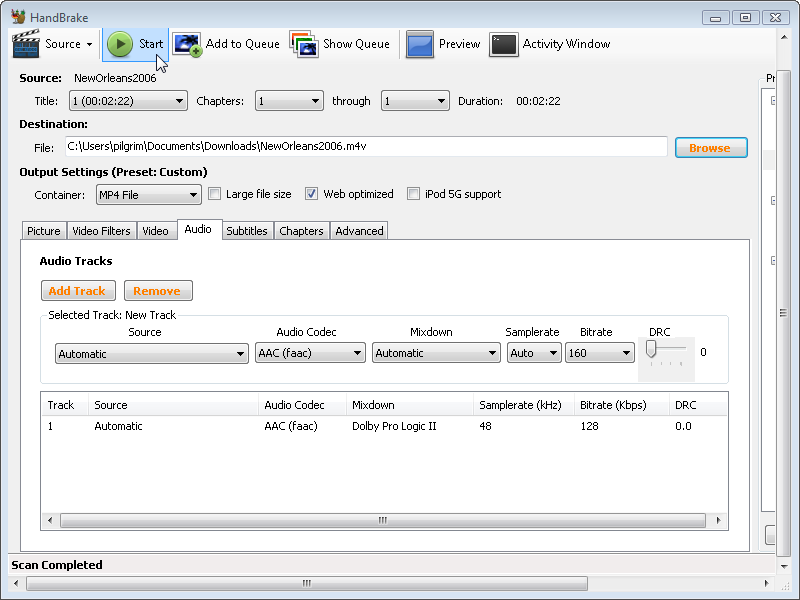
HandBrake will display some progress statistics while it encodes your video.
Patience, Grasshopper

(Just as in the previous section, in this section I’m going to use “H.264 video” as a shorthand for “H.264 baseline profile video and AAC low-complexity profile audio in an MPEG-4 container.” This is the combination of codecs+container that works natively in Safari, in Adobe Flash, on the iPhone, and on Google Android devices.)
HandBrake also comes in a command-line edition. As with ffmpeg2theora, the command-line edition of HandBrake offers a dizzying array of options. (Type HandBrakeCLI --help to read about them.) I’ll focus on just a few:
--preset "X", where “X” is the name of a HandBrake preset. The preset you want for H.264 web video is called “iPhone & iPod Touch”, and it’s important to put the entire name in quotes.
--width W, where “W” is the width of your encoded video. HandBrake will automatically adjust the height to maintain the original video’s proportions.
--vb Q, where “Q” is the average bitrate (measured in kilobits per second).
--two-pass, which enables 2-pass encoding.
--turbo, which enables turbo first pass during 2-pass encoding.
--input F, where “F” is the filename of your source video.
--output E, where “E” is the destination filename for your encoded video.
Here is an example of calling HandBrake on the command line, with command line flags that match the settings we chose with the graphical version of HandBrake.
you@localhost$ HandBrakeCLI --preset "iPhone & iPod Touch"
                            --width 320
                            --vb 600
                            --two-pass
                            --turbo
                            --input pr6.dv
                            --output pr6.mp4
From top to bottom, this command runs HandBrake with the “iPhone & iPod Touch” preset, resizes the video to 320×240, sets the average bitrate to 600 kbps, enables two-pass encoding with a turbo first pass, reads the file pr6.dv, and encodes it as pr6.mp4. Whew!
WebM is fully supported in ffmpeg 0.6 and later. On the command line, run ffmpeg with no parameters and verify that it was compiled with VP8 support:
you@localhost$ ffmpeg
FFmpeg version SVN-r23197, Copyright (c) 2000-2010 the FFmpeg developers
  built on May 19 2010 22:32:20 with gcc 4.4.3
  configuration: --enable-gpl --enable-version3 --enable-nonfree --enable-postproc --enable-pthreads --enable-libfaac --enable-libfaad --enable-libmp3lame --enable-libopencore-amrnb --enable-libopencore-amrwb --enable-libtheora --enable-libx264 --enable-libxvid --enable-x11grab --enable-libvorbis --enable-libvpx
If you don’t see the magic words “--enable-libvorbis” and “--enable-libvpx,” you don’t have the right version of ffmpeg. (If you compiled ffmpeg yourself, check to see if you have two versions installed. That’s fine, they won’t conflict with each other. You’ll just need to use the full path of the VP8-enabled version of ffmpeg.)
I’m going to do a two-pass encode. Pass 1 just scans through the input video file (-i pr6.dv) and writes out some statistics to a log file (which will be auto-named pr6.dv-0.log). I specify the video codec with the -vcodec parameter:
you@localhost$ ffmpeg -pass 1 -passlogfile pr6.dv -threads 16 -keyint_min 0 -g 250 -skip_threshold 0 -qmin 1 -qmax 51 -i pr6.dv -vcodec libvpx -b 614400 -s 320x240 -aspect 4:3 -an -y NUL
Most of the ffmpeg command line has nothing to do with VP8 or WebM. libvpx does support a number of VP8-specific options that you can pass to ffmpeg, but I don’t yet know how any of them work. Once I find a good explanation of them, I’ll link it here and incorporate them into the narrative if it’s worthwhile to do so.
For the second pass, ffmpeg will read the statistics it wrote during the first pass and actually do the encoding of the video and the audio. It will write out a .webm file.
you@localhost$ ffmpeg -pass 2 -passlogfile pr6.dv -threads 16 -keyint_min 0 -g 250 -skip_threshold 0 -qmin 1 -qmax 51 -i pr6.dv -vcodec libvpx -b 614400 -s 320x240 -aspect 4:3 -acodec libvorbis -y pr6.webm
There are five important parameters here:
-vcodec libvpx specifies that we’re encoding with the VP8 video codec. WebM always uses VP8 video.
-b 614400 specifies the bitrate. Unlike other formats, libvpx expects the bitrate in actual bits, not kilobits. If you want a 600 kbps video, multiply 600 by 1024 to get 614400.
-s 320x240 specifies the target size, width by height.
-aspect 4:3 specifies the aspect ratio of the video. Standard definition video is usually 4:3, but most high-definition video is 16:9 or 16:10. In my testing, I found that I had to specify this explicitly on the command line, instead of relying on ffmpeg to autodetect it.
-acodec libvorbis specifies that we’re encoding with the Vorbis audio codec. WebM always uses Vorbis audio.
I’m pretty sure this was supposed to be an HTML book. So where’s the markup?
HTML5 gives you two ways to include video on your web page. Both of them involve the <video> element. If you only have one video file, you can simply link to it in a src attribute. This is remarkably similar to including an image with an <img src="..."> tag.
One video file
<video src="pr6.webm"></video>Technically, that’s all you need. But just like an <img> tag, you should always include width and height attributes in your <video> tags. The width and height attributes can be the same as the maximum width and height you specified during the encoding process. Don’t worry if one dimension of the video is a little smaller than that. Your browser will center the video inside the box defined by the <video> tag. It won’t ever be smooshed or stretched out of proportion.
<video src="pr6.webm" width="320" height="240"></video>By default, the <video> element will not expose any sort of player controls. You can create your own controls with plain old HTML, CSS, and JavaScript. The <video> element has methods like play() and pause() and a read/write property called currentTime. There are also read/write volume and muted properties. So you really have everything you need to build your own interface.
If you don’t want to build your own interface, you can tell the browser to display a built-in set of controls. To do this, just include the controls attribute in your <video> tag.
<video src="pr6.webm" width="320" height="240" controls></video>There are two other optional attributes I want to mention before we go any further: preload and autoplay. Don’t shoot the messenger; let me explain why these are useful. The preload attribute tells the browser that you would like it to start downloading the video file as soon as the page loads. This makes sense if the entire point of the page is to view the video. On the other hand, if it’s just supplementary material that only a few visitors will watch, then you can set preload to none to tell the browser to minimize network traffic.
Here’s an example of a video that will start downloading (but not playing) as soon as the page loads:
<video src="pr6.webm" width="320" height="240" preload></video>And here’s an example of a video that will not start downloading as soon as the page loads:
<video src="pr6.webm" width="320" height="240" preload="none"></video>The autoplay attribute does exactly what it sounds like: it tells the browser that you would like it to start downloading the video file as soon as the page loads, and you would like it to start playing the video automatically as soon as possible. Some people love this; some people hate it. But let me explain why it’s important to have an attribute like this in HTML5. Some people are going to want their videos to play automatically, even if it annoys their visitors. If HTML5 didn’t define a standard way to auto-play videos, people would resort to JavaScript hacks to do it anyway. (For example, by calling the video’s play() method during the window’s load event.) This would be much harder for visitors to counteract. On the other hand, it’s a simple matter to add an extension to your browser (or write one, if necessary) to say “ignore the autoplay attribute, I don’t ever want videos to play automatically.”
Here’s an example of a video that will start downloading and playing as soon as possible after the page loads:
<video src="pr6.webm" width="320" height="240" autoplay></video>And here is a Greasemonkey script that you can install in your local copy of Firefox that prevents HTML5 video from playing automatically. It uses the autoplay DOM attribute defined by HTML5, which is the JavaScript equivalent of the autoplay attribute in your HTML markup. [disable_video_autoplay.user.js]
// ==UserScript==
// @name           Disable video autoplay
// @namespace      http://diveintomark.org/projects/greasemonkey/
// @description    Ensures that HTML5 video elements do not autoplay
// @include        *
// ==/UserScript==

var arVideos = document.getElementsByTagName('video');
for (var i = arVideos.length - 1; i >= 0; i--) {
    var elmVideo = arVideos[i];
    elmVideo.autoplay = false;
}
But wait a second… If you’ve been following along this whole chapter, you don’t have just one video file; you have three. One is an .ogv file that you created with Firefogg or ffmpeg2theora. The second is an .mp4 file that you created with HandBrake. The third is a .webm file that you created with ffmpeg. HTML5 provides a way to link to all three of them: the <source> element. Each <video> element can contain more than one <source> element. Your browser will go down the list of video sources, in order, and play the first one it’s able to play.
That raises another question: how does the browser know which video it can play? Well, in the worst case scenario, it loads each of the videos and tries to play them. That’s a big waste of bandwidth, though. You’ll save a lot of network traffic if you tell the browser up-front about each video. You do this with the type attribute on the <source> element.
Here’s the whole thing:
Three (!) video files
<video width="320" height="240" controls>
  <source src="pr6.mp4"  type="video/mp4; codecs=avc1.42E01E,mp4a.40.2">
  <source src="pr6.webm" type="video/webm; codecs=vp8,vorbis">
  <source src="pr6.ogv"  type="video/ogg; codecs=theora,vorbis">
</video>
Let’s break that down. The <video> element specifies the width and height for the video, but it doesn’t actually link to a video file. Inside the <video> element are three <source> elements. Each <source> element links to a single video file (with the src attribute), and it also gives information about the video format (in the type attribute).
The type attribute looks complicated — hell, it is complicated. It’s a combination of three pieces of information: the container format, the video codec, and the audio codec. Let’s start from the bottom. For the .ogv video file, the container format is Ogg, represented here as video/ogg. (Technically speaking, that’s the MIME type for Ogg video files.) The video codec is Theora, and the audio codec is Vorbis. That’s simple enough, except the format of the attribute value is a little screwy. The value itself has to include quotation marks, which means you’ll need to use a different kind of quotation mark to surround the entire value.
<source src="pr6.ogv" type="video/ogg; codecs=theora,vorbis">WebM is much the same, but with a different MIME type (video/webm instead of video/ogg) and a different video codec (vp8 instead of theora) listed within the codecs parameter.
<source src="pr6.webm" type="video/webm; codecs=vp8,vorbis">The H.264 video is even more complicated. Remember when I said that both H.264 video and AAC audio can come in different “profiles”? We encoded with the H.264 “baseline” profile and the AAC “low-complexity” profile, then wrapped it all in an MPEG-4 container. All of that information is included in the type attribute.
<source src="pr6.mp4" type="video/mp4; codecs=avc1.42E01E,mp4a.40.2">The benefit of going to all this trouble is that the browser will check the type attribute first to see if it can play a particular video file. If a browser decides it can’t play a particular video, it won’t download the file. Not even part of the file. You’ll save on bandwidth, and your visitors will see the video they came for, faster.
If you follow the instructions in this chapter for encoding your videos, you can just copy and paste the type attribute values from this example. Otherwise, you’ll need to work out the type parameters for yourself.
iPads running iOS 3.x had a bug that prevented them from noticing anything but the first video source listed. iOS 4 (a free upgrade for all iPads) fixes this bug. If you want to deliver video to iPad owners who haven’t yet upgraded to iOS 4, you will need to list your MP4 file first, followed by the free video formats. Sigh.
There are so many pieces to the video puzzle, I hesitate to even bring this up. But it’s important, because a misconfigured web server can lead to endless amounts of frustration as you try to debug why your videos play on your local computer but fail to play when you deploy them to your production site. If you run into this problem, the root cause is probably MIME types.
I mentioned MIME types in the history chapter, but you probably glazed over that and didn’t appreciate the significance. So here it is in all-caps:
VIDEO FILES MUST BE SERVED WITH THE PROPER MIME TYPE!
What’s the proper MIME type? You’ve already seen it; it’s part of the value of the type attribute on a <source> element. But setting the type attribute in your HTML markup is not sufficient. You also need to ensure that your web server includes the proper MIME type in the Content-Type HTTP header.
If you’re using the Apache web server or some derivative of Apache, you can use an AddType directive in your site-wide httpd.conf or in an .htaccess file in the directory where you store your video files. (If you use some other web server, consult your server’s documentation on how to set the Content-Type HTTP header for specific file types.)
AddType video/ogg .ogv
AddType video/mp4 .mp4
AddType video/webm .webm
The first line is for videos in an Ogg container. The second line is for videos in an MPEG-4 container. The third is for WebM. Set it once and forget it. If you forget to set it, your videos will fail to play in some browsers, even though you included the MIME type in the type attribute in your HTML markup.
For even more gory details about configuring your web server, I direct your attention to this excellent article at the Mozilla Developer Center: Configuring servers for Ogg media. (The advice in that article applies to MP4 and WebM video, too.)
Internet Explorer 9 supports the HTML5 <video> element, but Microsoft has publicly promised that the final version of IE 9 will support H.264 video and AAC audio in an MPEG-4 container, just like Safari and the iPhone.
But what about older versions of Internet Explorer? Like, you know, all shipping versions up to and including IE 8? Most people who use Internet Explorer also have the Adobe Flash plugin installed. Modern versions of Adobe Flash (starting with 9.0.60.184) support H.264 video and AAC audio in an MPEG-4 container, just like Safari and the iPhone. Once you’ve encoded your H.264 video for Safari, you can play it in a Flash-based video player if you detect that one of your visitors doesn’t have an HTML5-capable browser.
FlowPlayer is an open source, GPL-licensed, Flash-based video player. (Commercial licenses are also available.) FlowPlayer doesn’t know anything about the <video> element. It won’t magically transform a <video> tag into a Flash object. But HTML5 is well-designed to handle this, because you can nest an <object> element within a <video> element. Browsers that don’t support HTML5 video will ignore the <video> element and simply render the nested <object> instead, which will invoke the Flash plug-in and play the movie through FlowPlayer. Browsers that support HTML5 video will find a video source they can play and play it, and ignore the nested <object> element altogether.
That last bit is the key to the whole puzzle: HTML5 specifies that all elements (other than <source> elements) that are children of a <video> element must be ignored altogether. That allows you to use HTML5 video in newer browsers and fall back to Flash gracefully in older browsers, without requiring any fancy JavaScript hacks. You can read more about this technique here: Video For Everybody.
iOS is Apple’s operating system that powers iPhones, iPod Touches, and iPads. iOS 3.2 has a number of issues with HTML5 video.
poster attribute. The poster attribute of the <video> element allows you to display a custom image while the video is loading, or until the user presses “play.” This bug is fixed in iOS 4.0, but it will be some time before users upgrade.
<source> elements, iOS will not recognize anything but the first one. Since iOS devices only support H.264+AAC+MP4, this effectively means you must always list your MP4 first. This bug is also fixed in iOS 4.0.
Android is Google’s operating system that powers a number of different phones and handheld devices. Versions of Android before 2.3 had a number of issues with HTML5 video.
type attribute on <source> elements confused Android greatly. The only way to get it to recognize a video source is, ironically, to omit the type attribute altogether and ensure that your H.264+AAC+MP4 video file’s name ends with an .mp4 extension. You can still include the type attribute on your other video sources, since H.264 is the only video format that Android 2.2 supports. (This bug is fixed in Android 2.3.)
controls attribute was not supported. There are no ill effects to including it, but Android will not display any user interface controls for a video. You will need to provide your own user interface controls. At a minimum, you should provide a script that starts playing the video when the user clicks the video. This bug is also fixed in Android 2.3.
Here is a live example of a video that uses these techniques. I extended the “Video For Everybody” code to include a WebM-formatted video. I encoded the same source video into three formats, with these commands:
## Theora/Vorbis/Ogg
you@localhost$ ffmpeg2theora --videobitrate 200 --max_size 320x240 --output pr6.ogv pr6.dv

## H.264/AAC/MP4
you@localhost$ HandBrakeCLI --preset "iPhone & iPod Touch" --vb 200 --width 320 --two-pass --turbo --optimize --input pr6.dv --output pr6.mp4

## VP8/Vorbis/WebM
you@localhost$ ffmpeg -pass 1 -passlogfile pr6.dv -threads 16  -keyint_min 0 -g 250 -skip_threshold 0 -qmin 1 -qmax 51 -i pr6.dv -vcodec libvpx -b 204800 -s 320x240 -aspect 4:3 -an -f webm -y NUL
you@localhost$ ffmpeg -pass 2 -passlogfile pr6.dv -threads 16  -keyint_min 0 -g 250 -skip_threshold 0 -qmin 1 -qmax 51 -i pr6.dv -vcodec libvpx -b 204800 -s 320x240 -aspect 4:3 -acodec libvorbis -ac 2 -y pr6.webm
The final markup uses a <video> element for HTML5 video, a nested <object> element for Flash fallback, and a small bit of script for the benefit of Android devices:
<video id="movie" width="320" height="240" preload controls>
  <source src="pr6.webm" type="video/webm; codecs=vp8,vorbis" />
  <source src="pr6.ogv" type="video/ogg; codecs=theora,vorbis" />
  <source src="pr6.mp4" />
  <object width="320" height="240" type="application/x-shockwave-flash"
    data="flowplayer-3.2.1.swf">
    <param name="movie" value="flowplayer-3.2.1.swf" />
    <param name="allowfullscreen" value="true" />
    <param name="flashvars" value="config={'clip': {'url': 'http://wearehugh.com/dih5/pr6.mp4', 'autoPlay':false, 'autoBuffering':true}}" />
    <p>Download video as <a href="pr6.mp4">MP4</a>, <a href="pr6.webm">WebM</a>, or <a href="pr6.ogv">Ogg</a>.</p>
  </object>
</video>
<script>
  var v = document.getElementById("movie");
  v.onclick = function() {
    if (v.paused) {
      v.play();
    } else {
      v.pause();
    }
  };
</script>
With the combination of HTML5 and Flash, you should be able to watch this video in almost any browser and device:
<video> element
x264 codec
Pre-built custom controls for HTML5 video:
This has been “Video on the Web.” The full table of contents has more if you’d like to keep reading.
In association with Google Press, O’Reilly is distributing this book in a variety of formats, including paper, ePub, Mobi, and DRM-free PDF. The paid edition is called “HTML5: Up & Running,” and it is available now. This chapter is included in the paid edition.
If you liked this chapter and want to show your appreciation, you can buy “HTML5: Up & Running” with this affiliate link or buy an electronic edition directly from O’Reilly. You’ll get a book, and I’ll get a buck. I do not currently accept direct donations.
Copyright MMIX–MMXI Mark Pilgrim